
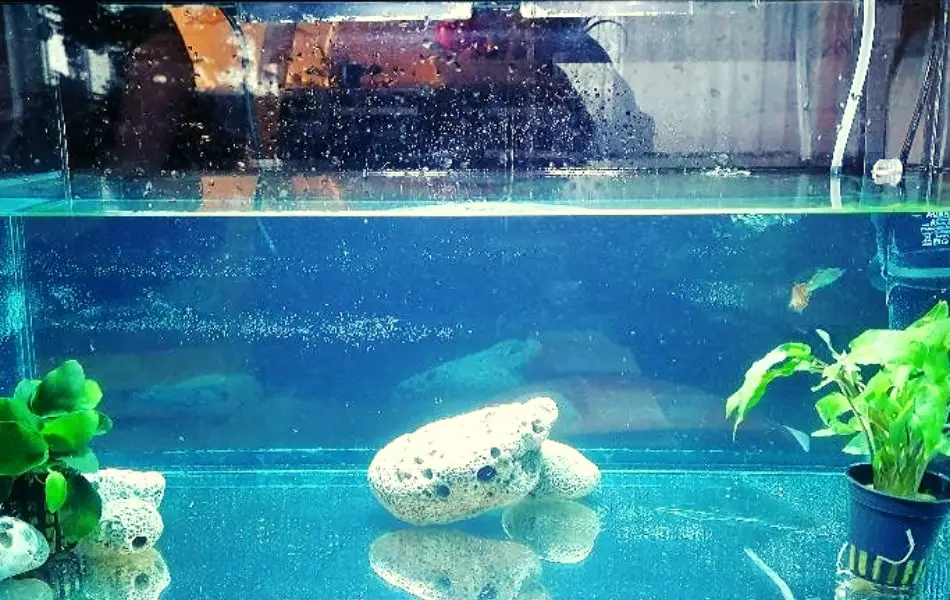
If you look into an aquarium that hasn’t been recently cleaned, it’s destined to look grimy with dirt, debris, food particles, and waste built up- especially in the bottom where the gravel is located. We all know that this isn’t great for our fish’s environment, but cleaning the gravel can be such a pain. Is there a way to do this without dumping all the water?
How do you clean fish tank gravel without removing water? The best way to clean fish tank gravel without removing water is to invest in a vacuum kit. You also have the option of making one yourself with just a few materials. These vacuums provide a thorough cleaning in a matter of minutes and you don’t need to stress about emptying anything.
Knowing that there are options when it comes to cleaning your fish tank gravel instantly takes loads of stress off your shoulders, right? We are going to discuss the two best ways to clean a fish tank without removing water. We will also be sharing some useful information to have in your arsenal, such as why you need gravel and why you need to clean it regularly, too.
Why You Need Gravel in an Aquarium
A lot of people think that gravel in an aquarium is just for aesthetics. And while gravel- no matter the size or color- is visually appealing in an aquarium, it serves several beneficial purposes. Here are some of the top reasons why you should consider adding gravel to your aquarium:
It works as a natural filtration for the tank.
A fish, or multiple fish, live in the same tank day in and day out. They can’t leave the tank to go to the restroom or eat their food- it all happens in the same location. The tank is going to eventually be filled with leftover food particles, waste from the fish, and possibly other elements of debris from plants inside of the tank.
A build-up of these materials has a negative effect on the way the tank looks as well as on the fish themselves. This is where gravel comes in handy- aquarium tank gravel acts as a house for beneficial bacteria that scorches through harmful debris. Therefore, the more gravel you have in your aquarium, the less you will notice waste and nasty particles building up- especially on the bottom.
You won’t have to clean the tank as often.
A tank that lacks any type of gravel will quickly have a buildup of debris at the bottom of the tank. Unfortunately, even with regular cleanings, this debris accumulates quickly as there is simply no other place for the food, waste, and other elements to be broken down.
This is where gravel in an aquarium comes incredibly handy. Since the gravel ends up doing a lot of filtration for you, you won’t have to worry about cleaning the tank as often.
It provides a safe place to hide.
Some fish prefer to hide in order to feel safe, and that is just another benefit of placing gravel inside of your fish tank.
It is the perfect spot for fish eggs.
If at one point, one of your fish becomes pregnant, you will be glad to have gravel in your aquarium. This replicates the natural environment for the fish, where they would automatically hide their babies to stay safe from predators. This equates to healthier fish eggs and babies in the long run.
Bottom feeders enjoy scavenging in it.
If you are planning to have a bottom feeder in your tank, they will thank you for the gravel. Here, they will not only have a place to gracefully slide and sweep but a perfect spot to munch on leftover food, too.
They reduce glare.
Did you know that glares and reflections can stress out your fish? Well, gravel comes to the rescue in this situation. The gravel reduces the chances of any type of glare occurring in your tank, leading to happier, stress-free fish.
It gives plants a better place to thrive.
It is also beneficial for any living plants you might consider adding to your tank. The gravel acts as a solid housing for the plant, while also ensuring they have the right bacteria to thrive.
Why You Need to Clean the Gravel in Your Aquarium
Knowing that gravel acts as a natural filter, it can be easy to think that it doesn’t need to be cleaned regularly- but this isn’t entirely true. While you don’t need to clean the gravel in your aquarium too often, eventually the debris will accumulate and lead to dirty water. Algae may start to grow in compact areas, too.
The main purpose of cleaning the gravel in your aquarium is to remove larger debris and any build-up that can be seen within the tank. You will also be able to loosen up the gravel a bit to avoid algae compiling within the compact spaces.
How Often Should You Clean the Gravel?
At this point, you’re likely wondering how often is often enough? Well, the best way to describe it is like this:
- A clean tank with plenty of live plants and not too many fish should only need to be cleaned once a month.
- A clean tank with plenty of live plants and fish should be cleaned every 2 weeks.
- A clean tank with no live plants but plenty fish should also be cleaned every 2 weeks.
It’s clear that having enough plant life in your tank without adding too many fish will create the best habitat while also reducing how often you will need to clean the gravel. Every fish tank will be different, though, so it is important to keep an eye on the situation. A tank with plenty of live plants may notice a build-up of dead leaves which will need to be taken care of before they cause an issue.
How to Clean Fish Tank Gravel Without Removing Water- Two Ways
If you are ready to say goodbye to the nuisance of draining all the water in your fish tank and struggling to capture all your fish just to clean the gravel once or twice or month, you will be glad to know that there are two great ways to clean thoroughly: with a vacuum kit or a DIY vacuum. Let’s take a closer look:
Vacuum Kit
Vacuum kits, like this STARROAD-TIM Fish Tank Aquarium Gravel Cleaner Kit, are a handy device that are used to collect debris from the gravel in your aquarium tank without needing to remove the water. Most models are priced around $20, so you don’t have to worry about breaking the bank.
Keep in mind that it is still ideal to switch out at least 10 to 20 percent of the water regularly to keep the tank in top-notch condition. The good news is that using a vacuum kit will automatically remove this amount of water so that you add fresh water every time you use the tube.
What You Will Need:
- Vacuum Kit
- Bucket for the old water and debris
Steps to using a vacuum kit efficiently and thoroughly:
#Step 1 – Take out the heater, filter, and air pump.
This is the first and most important step as you don’t want to damage any of these pieces of equipment. The good news is that you can leave everything else in your fish tank, such as the fish and plants. However, it is a good idea to remove decorations as debris can accumulate underneath them. Most aquarium aficionados will also take the opportunity to give the decorations a quick scrub, as they can get slimy and covered with algae quickly.
#Step 2 – Have your water bucket ready.
You should have a water bucket on-hand to collect the dirt and debris that the vacuum kit picks up. Keep the bucket on the outside of the fish tank. The tube should be connected to the bucket.
#Step 3 – Place the siphon inside the water.
The siphon should be entirely submerged in the water; otherwise, it won’t work. You may want to have part of the tubing in the water, too, to make the flow easier.
#Step 4 – Start pulsing the siphon up and down about 3 inches above the gravel.
Continue to do this, gently, until you have a good flow of water streaming through the tube and into the bucket on the outside.
#Step 5 – Clean the gravel.
Continue to pulse the siphon on the gravel. To acquire a deeper and more efficient cleaning, push the tube further into the gravel. You may suck up a few pieces of gravel by doing so, but they will be easily replaced when you are done.
#Step 6 – Turn the gravel siphon upside-down.
Once you’re satisfied with the cleaning, and the water level has gone down by around 25% or less, then you can turn the gravel tube upside down and complete the process.
#Step 7 – Remove the siphon and add water.
At this point, you can remove the siphon from your fish tank by placing your hand over the opening of the siphon, which should automatically suction. Empty it out completely into the bucket. Then, fill up the tank with water so it’s at top. You can then place the heater, filter, and air pump back in the tank.
This video shows a great step-by-step visual on how to properly use a vacuum kit to remove dirt and debris from your gravel.
As you can see, vacuum kits are easy to use and won’t require you to remove any water- the siphon does that for you. The best part is that they are cheap and can be utilized by anyone, whether they are new to the game or have been around for years. Your fish (and tank) will thank you for the thorough cleaning.
DIY Vacuum

If you don’t have any extra money for a vacuum kit or simply don’t want to wait for a week for the shipping and handling to process and land on your doorstep, then you can always make a DIY vacuum kit right from home. And don’t worry- this isn’t some crazy Pinterest craft that only professional DIY-ers can accomplish.
Here’s what you will need:
- Plastic tubing about 1 meter long.
- A plastic bottle, such as a water bottle or soda bottle.
- A bucket for capturing water.
And here are the simple steps to follow to make your very own vacuum kit at home:
#Step 1 – Gather Your Materials.
You likely already have a plastic bottle lying around, but tubing may be another issue. Aquarium shops and hardware shops should have tubes available for cheap, and you want to acquire a tube that is at least 1 meter (or 3 feet) long.
#Step 2 -Cut the plastic bottle right below the label.
But don’t discard the top half, as it will be useful for creating your DIY vacuum kit.
#Step 3 -Cut a hole in the bottle lid.
Place your tube on the bottle and trace it for a perfect fit. Then, using a drill bit or a sharp knife, cut the hole into the bottle lid. Be careful when doing so.
#Step 4 -Place the tube inside the hole and reattach the lid.
It should be a perfect fit.
#Step 5 -Submerge the bottle lid and some of the tubing into the aquarium.
Think of the plastic bottle as your siphon and perform this step just as you would in the previous section with an actual vacuum kit.
#Step 6 -Make sure the tubing is connected to a bucket.
Remember- the goal here is to get rid of dirt, grime, and other unwanted debris, but water will also be removed during the process. Have the tubing connected to a bucket to capture this water.
#Step 7 -Continue to clean the tank.
Pulse the bottle up and down in the water to get the water flowing, then start placing the bottle deeper into the gravel to clean it thoroughly. Continue until you are satisfied.
#Step 8 -Remove the bottle and add clean water.
You can remove the bottle in the same way as the siphon, covering the opening with your hand until you can empty into the bucket. Then, refill the water with clean, temperate water and add the filter, heater, and air pump.
There you have it—an easy to create a vacuum for your fish tank. For a better look at how it’s done, here is a great Youtube video on “Fish N Tips” Channel that shows how to make a DIY vacuum kit (as well as the one we will discuss next) and how to use it properly.
DIY Air-Powered Cleaner

There’s another handy project you can consider that works great for cleaning out your aquarium’s gravel, and it’s known as the DIY air-powered cleaner. This type of gravel cleaner only requires a few simple materials and works wonders in aquariums of all shapes and sizes. Plus, you can create it in just a few minutes, making it a big WIN.
What You Will Need:
- Plastic Bottle
- Rubber Band
- Air Tube with air stone attached to it.
- Mesh Bag (Old Tights Can Also Work)
Once you have your materials gathered, simply do the following:
- Cut off the bottom of the bottle. You want the bottle to remain tall, so only cut off about 2 or 3 inches of the bottle.
- Drill a hole into the side of the bottle. The hole should accommodate the size of the tubing you’re using, so it is a good idea to measure beforehand.
- Feed the air tube through the hole
- Take off the lid and attach the bag. Secure with a rubber band. Here, you will simply be taking off the lid from the bottle and tossing it. Place the mesh bag (or tights) over the bottle and secure tightly. Leave a little extra material hanging off to ensure it is a tight fit.
- Place it into the aquarium and clean. With this way of cleaning gravel, you won’t even need a bucket as water will not be leaving the tank. However, you will still follow the same instructions of placing the bottle into the water and going up and down about 3 inches above the gravel. Go deeper for a more thorough cleanse.
This is a very simple solution when it comes to cleaning aquarium gravel without removing water. Not only can you whip this handy gadget together in minutes, but you don’t need any buckets or have to worry about adding more water when the cleaning is complete. Keep this item on-hand for future cleanings and you will be glad you did.
Conclusion
Trying to clean gravel in an aquarium can be a major hassle. Aside from the annoyance of having to remove virtually everything from the tank, you’ll be wasting a ton of time and energy trying to empty all the water out. Luckily there are other options when it comes to cleaning gravel, whether you opt for a handy vacuum kit or opt to make one on your own.
